Friday, December 23, 2011

Dog harness for my dog

I wanted to make a halter for my dog and made this in about a hour.
This is where I found the pattern here: http://luvs-2-knit.blogspot.com/2009/07/easy-dog-harness.html?m=1

Friday, December 9, 2011

Pacifier chain

I made this for my co-worker's son. This is the first one I've made so I want to see if she likes it or if it needs improvements.
The pattern can be found here.

Also see pattern for example of pacifier attachment.

Tuesday, August 30, 2011

Creation hiatus

I haven’t created anything since about June 2011. I started a new job and have been overwhelmed with going to college full time and working full time.
I really need to crochet or sew something soon or I think I might explode! Lol
Hopefully I’ll have something new to post!
I have become addicted to pintrest.com in my spare time if you have an account find me! I’m Thimblefairy on there too!
Don’t forget I’m also on swapbot, but I haven’t been on there in months either!

Have a great day everyone!

Tuesday, April 19, 2011

Adipose from Dr. Who

This is an image of the Adipose from Dr. Who.

I was so excited when I found this pattern! The pattern can be found on Ravelry, here.
When I first did the feet they came out like the foot on the left, a little off then I altered the pattern slightly and came up with the foot on the right. I re-did the other so that they matched and they looked great! Pattern for the feet is under the photo.

I found the pattern to be a bit confusing when I got to Rnd 3 of the feet, when it came to making the “toes.”

Working in back loop, sc in next 6 sts,

When it came to this part: working in both loops, [sc, trc, sc] in the
next 5 dc (toes made), I did it a bit different. I did the first sc and the trc normal, but the second sc I did differently. I inserted the hook from the back, drew up a loop and pulled it through, this made a loop over my hook and yarn that I was using, so I then pulled the hook through the large loop so that it wouldn't make a knot. I then yo and pulled through the 2 loops, finishing the sc and continued on. I did this for every second sc that was needed to make the toes.

I then continued as the pattern followed:
working in back look, sc in next 4 sts, move up marker
(22 sc, 5 trc)

All in all I LOVE how he came out! Another favorite!!

*When I sewed on the mouth I went under one stitch so it would make it look like a tooth, just like the actual Adipose from Dr. Who.

**Row counts are off by one stitch starting at rnd 5. Rnds 5-26 should have 1 more stitch than indicated. Rnds 28-31 continue with the correct counts.

Friday, April 1, 2011

Minion

I originally got the pattern from, here, but I kept finding problems with that pattern. So I altered it. lol I know I almost always alter my patterns. But I altered this one so much, so instead of just posting the alteration I am going to post the pattern completely wiht my changes!

I used a 3MM crochet hook.
-Body-
In yellow
Rnd 1- sc 6 in a circle
Rnd 2- increase in each sc around (12)
Rnd 3- "sc 1, increase in next sc" around (18)
Rnd 4- "sc 2, increase in next sc" around (24)
Rnd 5-15: sc around
Rnd 16- "decrease, then sc 2" around (18)
Rnd 17- "decrease, then sc 1" around (12)
--stuff
Rnd 18- decrease in each sc around (this end fits into the pants to hide it.)

-Pants-
In blue
Rnd 1- sc 6 in a circle
Rnd 2- "increase in each sc around" (12)
Rnd 3- "sc 1, increase in next sc" around (18)
Rnd 4- "sc 2, increase in next sc" around (24)
Rnd 5- increase 2, sc in the rest of the sts (26)
Rnd 6-9- sc around (26)
Rnd 10- slip st 6, double crochet 7, slip st 6, double crochet 7, fasten off

-Suspenders-
chain 10, tie onto pants.

-Arms-
In Yellow
Row 1- Chain 6, in the 2nd sc from the hook sc, then sc in the next 3 st's (5)
Rows 2-4- ch 1, sc across (4)
Finish off, but leave a long tail
In black
On the short side of you rectangle, 2 rows of black with 4 st in each
Finish off, leaving a long tail
Roll the rectangle so the black is on one end and the yellow is on the other.  Sew the outer edges together using the appropriate color.

-Legs-
Rnd 1- sc 6 in a circle
Rnd 2- increase 3, and sc in the rest of the sts (9)
Finish off, and switch to blue
Rnd 3- sc in back loops
Rnd 4-5- sc around
Finish off leaving a tail

-Eye/ Goggle-
With white
Rnd 1- sc 6 in a circle
switch to grey
Rnd 2- increase in each sc around (12)
for the pupil tie a knot and attach it to the center of the white circle

-Goggle Strap-
In black
chain enough st to wrap around your minions head, then attach to the goggle
Tie ends onto goggle. Sew the finished goggle onto the body, where appropriate.

Hello Kitty

I think Hello Kitty is so cute! I found this pattern, here. I altered it, of course. lol I have mostly seen HK in red and pink, so those are the colors that I used. I also attached 2 small yellow buttons. I fashioned her after this image:

The eyes I followed the pattern for the nose, magic ring of 6 sc, which I sewed onto the face making an oval as I sewed it on.
For the whiskers I used yarn instead of felt. I made a sort of "cross" shape by tying one short string to another in the middle and cut one end to make a short to T shape. I then pulled the strings through stitchs to make the whiskers.

I didn't like the bow that came with the pattern so I made this one up:
-Bow-
Row 1: ch 8, sc in 2nd ch from hook and in each ch across: 7 sc
Rows 2-3: ch 1, turn, working in back loops only, sc in each sc across: 11 sc
Border: do not turn, sc in along side of each row, in each ch across bottom, and along other side of each row.
Slip stitch until the middle of the bow, about the 4th sc in from the side, cut yarn, leaving long tail with last slip stitch on your hook still. After you cut the yarn, pull it through the slip stitch. Wrap tail around bow and tie in a knot. Then wrap the tail around the bow until it is the desired size pull tail under all of the loops you just made, this will secure it. With the remaining tail sew bow on.

The body I also altered:
-Body-
(In red)
Round 1: 6 sc into magic ring (6)
Round 2: 2 sc in each sc around (12)
Round 3: sc in next st, 2 sc in next sc, around (18)
Round 4: sc in next 2 sts, 2 sc in next sc, around (24)
Round 5: sc in next 3 sts, 2 sc in next sc, around (30)
Round 6: sc in next 4 sts, 2 sc in next sc, around (36)
Round 7: sc around (36)
Round 8: sc in next 4 sts, dec over next 2 sts, around (30)
Round 9-10: sc around (30)
(switch to Pink)
Round 11: sc in next 3 sts, dec over next 2 sts, around (24)
Round 12-14: sc around (24)
Round 15: sc in next 2 sts, dec over next 2 sts, around (18)
Round 16: sc around (18)
F/O leaving long tail to attach to head


Australian Koala

I love koalas, I don't know why but I do. They're so cute! I found this pattern, here. It came out so cute, but I thought he needed to be holding something. So, I printed 2 AUS flags and glued them onto a toothpick. Then I sewed the flag between his hands.

Washclothes

These are the first washclothes I have ever crocheted. I like how they came out.
The pink circle one I used 100% cotton, it has little strings sticking out so I thought that would be good for scrubbing. The pattern can be found, here.
The pink, purple and white square I used a cotton blend; 50% cotton, 20% flax, 25% viscose, 5% acrylic. I can't find the pattern now though, but it was a dc and hdc pattern. I also made one of a sc and dc pattern, which is this patter, here.

Tuesday, March 29, 2011

Heart with wings and crown

I originally found this pattern for a flying heart, here, but I didn't like the wings. I did however use that pattern for the heart though. I didn't know how to join the two parts needed in the heart and I found this tutorial, here, and it helped a lot.
So I used the idea from wings from the Snitch pattern, which can be found in the previous posting, but altered it. The pattern for the wings can be found below.
For the crown, I couldn't find a pattern the right size, so I made one up, it can also be found below.
I was telling my boyfriend about this one and as I described it I said it looked like those tattoo hearts with wings. I laughed and said I should make all the tattoos I want in amigurumis, because I can't have tattoos due to a metal allergy! So my quest will be to make tattoo amigurumis soon!
This is probably my favorite thing I've made so far! I absolutely love it!

St = Stitch
Sc = Single crochet
Dec = Decrease: Insert hook into st and draw up a loop. Insert hook into next st and draw up a loop. Yarn over, draw through all 3 loops on hook.
Inc = Increase: Work 2 single crochet into designated stitch

Crown
Ch 23, turn
Row1: 1 sc in each of the 22 stitches, ch1, turn
Row 2: * 1 sc in the next 3 stitches, ch1, turn
Row 3: Dec, sc, ch1, turn
Row 4: Dec, slip stitch in to the third stitch of second row, repeat from * three times
Finish, but don't cut the yarn too short. Use that yarn to sew the ends together and to sew the crown to the heart.


Wings
Row 1: Ch 2, 6 sc in 2nd ch from hook(needs to be like this NOT in a magic ring). Ch 1, turn
Row 2: *2 sc, inc, 1 sc* repeat twice (10 sc). Ch 1, turn
Row 3: *sc, [sc, inc] 3 times* sc 3times (13). Ch 1, turn
Row 4: sc across (13) turn, do not ch 1 yet!
Row 5: [ch 6, sl to in next sc] repeat twice, [ch 3, sl to in next sc] repeat twice, [ch 4, sl to in next sc] repeat 3 times, [ch 3, sl to in next sc] repeat 4 times, [ch 2, sl to in next sc] repeat twice


Crobot and Snitch

A friend of mine really wanted SOMETHING, anything, as long as I crocheted it for her. So I made her this Bopbot from the book Crobots. I think he's kinda cute and I'm happy how he came out. I realized I missed one row, but I still like how it came out!


I made this Snitch for me. I love Harry Potter and when I found this pattern, here, I had to make it!

Finished Teacup gift

These are the teacups I made for my, now ex-boyfriend's Nan.
I added a MB on the tea tag of the large cup for her initials.
I used the same pattern as posted in previous postings. The large teacup is my own pattern and can be found in my blog.

Tuesday, March 15, 2011

My first pattern, a Teacup!!

I'm extremely excited to show off my first pattern. I took the idea from the previous teacups I've made from patterns that I slightly altered. But this one I re-invented and added so much to it!
It make a life-size teacup now.
I made this for my boyfriend's Nan. She loves tea and has a brown and tan living room. So I wanted to make it brown, but added blue to make it interesting. I love how it came out. I hope she loves it as much as I do!
Here are some images of the teacup itself and the pattern will follow the photos.
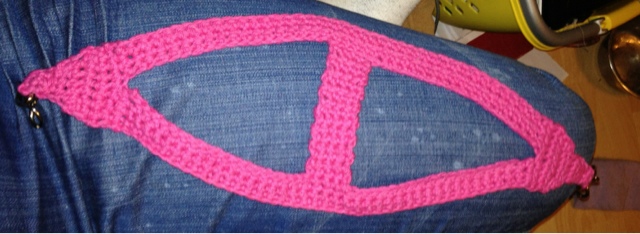
Before I added the bottom rim:


Here you can see the bottmo and bottom rim better.


I originally found a pattern for a teacup bookmark, I used that to make a few keychains. Well then I altered it so much, that I consider it mine. I made a medium sized teacup and made my own pattern. I wrote it all down. So here it is. If you don't understand please leave a comment and I'll try to help out as much as I can!

TEA CUP
MC= Main color
AC= Alternate color
4.5mm crochet hook

Cup
With MC, work 6 sc into magic ring. (6)
Round 1: 2 sc in each stitch (12)
Round 2: *2 sc in first st, sc in next st* repeat (18)
Round 3: * 2 sc in first st, sc in next 2*repeat (24)
Round 4: attach AC and continue with AC *2 sc in first st, sc in next 3* repeat (30)
Round 5: attach MC and continue with AC *sc in each stitch* (30)
Round 6: *sc in each stitch* (30)
Round 7: attach AC and continue with AC *sc in each stitch* (30)
Round 8: attach MC and continue with AC *sc in each stitch* (30)
Round 9: *sc in each stitch* (30)
Round 10: attach AC and continue with AC *sc in each stitch* (30)
Round 11: attach MC and continue with AC *sc in each stitch* (30)
Round 12: *sc in each stitch* at end of round 12 slip stitch to first sc of round (30)
Fasten off

When you are finished you will have 3 single rows of your AC, with 2 rows of your MC between them.
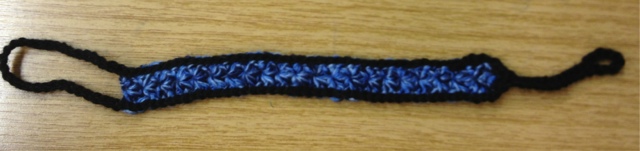
Lower rim
Ch 31 with color of your choice, I used my AC so it lined up with that row.
Sc in second ch for hook and sc in each ch across (30)
fasten off and leave long tail for attaching.
Sew the chain side to the cup. I lined mine up with my AC so it matched.

Handle
Ch 4, Sc in second ch for hook and in next 2 ch, turn
Row 2-12: Ch 1, sc in each sc across, turn
At end of row 12, fasten off and leave long tail
Using long tail sew the long ends together, then sew to cup

Teabag
Leave long tail, this will be used for the string of the tea bag and attached to the cup
Ch 4, Sc in second ch for hook and in next 2 ch, turn
Row 2-4(or to your desired height): Ch 1, sc in each sc across, turn
At end of row 4, fasten off and weave tail into piece
Using long tail from the beginning, attach to top rim of cup where ever you'd like the tea bag to be coming out of the cup.

Tea (will be sewn into cup)
With Tea color, work 6 sc into magic ring. (6)
Round 1: 2 sc in each stitch (12)
Round 2: *2 sc in first st, sc in next st* repeat (18)
Round 3: * 2 sc in first st, sc in next 2*repeat (24)
Round 4: *2 sc in first st, sc in next 3* repeat (30)
Round 5: *2 sc in first st, sc in next 4* repeat (36)
Round 6: *2 sc in first st, sc in next 5* repeat (42)
Fasten off, leave long tail for sewing to cup
Stuff cup
Attach tea to cup

Strawberry

My mom's other co-worker can't have strawberries because of allergies. So I thought it would be funny to give her a strawberry that she could actually have! I made the stem a bit longer by just chaining a few more and then brought it back down and slip stitched it to the top of the strawberry to make a loop, to make it a keychain.
I followed this pattern, here.
I didn't know how to carry a color on, so I searched it and found this great link, here.

Small teacups

So I updated my keychain from before. I added a teabag!


I then made another for my mom's co-worker who LOVES tea. It was her idea to make the teabags!


Teabag
Leave long tail, this will be used for the string of the tea bag and attached to the cup
Ch 4, Sc in second ch for hook and in next 2 ch, turn
Row 2-3(or to your desired height): Ch 1, sc in each sc across, turn
At end of row 3, fasten off and weave tail into piece
Using long tail from the beginning, attach to top rim of cup where ever you'd like the tea bag to be coming out of the cup.

Sunday, March 13, 2011

Severed witch finger

So I made my mom a severed witch finger, then turned it into a keychain!
She LOVES it!
I made it from the same patter as before, here. I did however make the nail a bit longer.
For my nail I did something like this, I didn't count my rows as I went so this is approximate, but should be very close to it:
R 1 (AC[red]) - ch 2, 3 sc in 2nd ch from hook, turn
R 2 - ch 1, 1 sc in each st
R 3 - rep r 2, 4 times
R 6 - ch 1, 1 sc, 2 sc in next st, 1 sc, turn
R 7 - ch 1, 4 sc, turn
R 8 - rep r 3, 4 times
* To finish nail off, sc around entire nail and fasten off with enough yarn to sew onto finger


I didn't know how to do a spike stitch so I found this video that really helped, here.


Teacup keychain

I originally wanted to make this bookmark, here. However I had a larger hook, 3mm, and larger yarn. As I finished the teacup I liked the size for a keychain instead, so I chained a few, like the pattern called for if I was making a bookmark. Then after I chained about 10 I slip knotted into the stitch next to where the chain begain, and I used this for the loop to make it keychain. I did my best of what I understood of the handle as well. The tea color I followed but left out that last row that the pattern called for using the teacup color.


Shamrock bookmark

I'm in a pick 3 swap on swap-bot.com and I didn't know what to send my partner, I needed one more thing. Well one of the choices to send was a bookmark. Since it's a few days before St. Patrick's day I thought I'd make her a shamrock bookmark.
So I found a pattern online. Then I found out I had to learn how to Tr = treble crochet and Dc = double crochet. So I found videos online that explained how to do that.

-LINKS-
These are the videos I used.
How to Treble crochet video
How to Double Crochet video
Here is the pattern I used, here.

This is the final result. I made the small one from the pattern. I used a 3mm hook though. I don't know what the size yarn is that I used, because I don't know how to read German labels, but I think it came out alright. This is the bookmark shown in one of my books, it's a standard paperback book, to show the resulting size. Also, as you can see I didn't add the tassel that the pattern recommends either.

Severed finger

This is a great pattern, here. It's a lot of fun. I added strands to the
end of mine to make it look like blood dripping. lol
I used a white for the finger, I wanted it to look a bit more natural, but it ended up too white. lol I used blue for the fingernail, tan for the joint creases, and a bumpy red yarn for the blood. As a side note for the red yar, I will NEVER use that for amigurumi again! lol
I didn't know how to do a spike stitch so I found this video that really helped, here.


At what poing does a pattern become yours, even if it's free? After one change to the patter? 15?! I would really like to know because I've changed something in almost everything I've made.

I've been busy!

A devil, snail, ladybug

The devil was made from the same pattern that I used to make the previous devil (Pattern here), but instead I used the head shape for the body and the body for the head. I think it turned out nicely actually. I don't know why the sizes still seem wrong, but they are what they are.


I then made my mom a snail from this pattern, here.
I didn't realize until after that I should have made the body much longer, to go all the way under the shell. But live and learn, and that's what I'm doing with my crocheting!


And last but not least for this post. One of my favorites so far. A ladybug for my mom! I didn't add the legs as suggested by the pattern, but you rarely see ladybug legs any way, and I think she looks better without them any way. I also used 2 different hook sizes on the circles on her back, and I added a line down her back to make it look like the line that seperates the wings. The pattern can be found here.


Friday, March 4, 2011

About my art

-Sewing-
I love to sew. My grandmother taught me how to sew. I like to reconstruct clothes, use old tshirts for material and reuse many other things for my sewing projects.

-Crochething-
I taught myself how to crochet using videos I found on youtube. I will post the links to the videos when I find them again so that they can help others too.

I only know how to start Amigurumi with a magic ring, so if it says something different or says "Ch 2, 6 sc in first ch." I simply just make a magic ring with 6 single crochets. I don't know how to do rows yet, but I want to learn.

I wanted to be able to share my progress, patterns I find and use, as well as videos I have used to help me learn.

Eve from Wall-E

This is my favorite so far! I LOVE how Eve came out. The pattern can be found here on sukigirl's blog.
Side view

Front view


I still want to figure out how to make her eyes look better, but I like them for this one. I will be making more of these, they're too cute!

Thursday, March 3, 2011

Little devil

I love this little guy he's so cute! I made him using this pattern here.
Th pitchfork I didn't sew on to his hand, but actually stuck it through his hand, it really looks like he's holding it now. lol

I added a tail, I just made a long tube that started with magic ring of 6 sc and just kept making single crochets until I liked the length then put a red pipe cleaner inside before sewing it to the devil, that way I could bend the tail if I wanted and it helped him stand up better.

Before his tail and pitch fork were added. That's my mom's tattoo by the way lol

Side view

Front view

I also used buttons for his eyes instead of the safety eyes that the pattern called for, I didn't have any. And I sewed a little mouth on, when I tied the knot on the mouth I was going to pull it through, but I liked how it looked as goatee. lol

Tuesday, March 1, 2011

Skull

I like making creepy things, well what other people consider creepy. lol
I found a pattern online for a skull and wanted to try my hand at it. Here is the pattern if you'd like to try. The only thing I changed was for the eyes I just made a magic ring with 8 single crochets.
Side view, so you can see the bump where the brain would be. lol

Front view

Thursday, February 24, 2011

My first projects.

I started crocheting Febuary 24, 2011. I learned everything I know now from videos I watched on youtube.
I first created a kind of zombie from a book that my mom baught me called Crobots.
The pattern can be found here for this one. The author of the book posted this.

The white one was my first go at crocheting. The black one was my second, I made it on Feb 25. I was progressing. I knew the mistakes I made in the white one, including a few rows. Their arms are supposed to look like that, they are supposed to look like ther're falling off. I tried to follow what the pattern said for that. Also the eye on the black one is also supposed to look like it's falling off.
I then made a witch hat and broom for the black zombie doll on Feb 27. These I created from a pattern that I found online that I altered slightly so they would fit him better.

The pattern for the broom and hat that I altered I found here. I followed the directions for the hat through round 11. I made round 12(Sc in next st, 2 sc in next st) around. Then round 13 (2 sc in every st) around. Then I bent the top of the hat and sewed it to the doll.

For the Broom I followed the pattern for the broom on the same site as above. Except when it came to "Rnd 3-13: Sc in each st around, join with sl st in first st. Fasten off" I just kep sc around not counting until I got the length that I thought looked right for my doll. I also judged the amount of "Bristles" by what I thought looked right for the size of my broom and doll